Hedge Spacing Guide: Single vs. Double Zigzag Rows for Privacy Screens
Calculate how many shrubs you need for a privacy hedge, compare single vs. double zigzag rows, dig a healthier trench, and trim hedges so bottoms stay green.
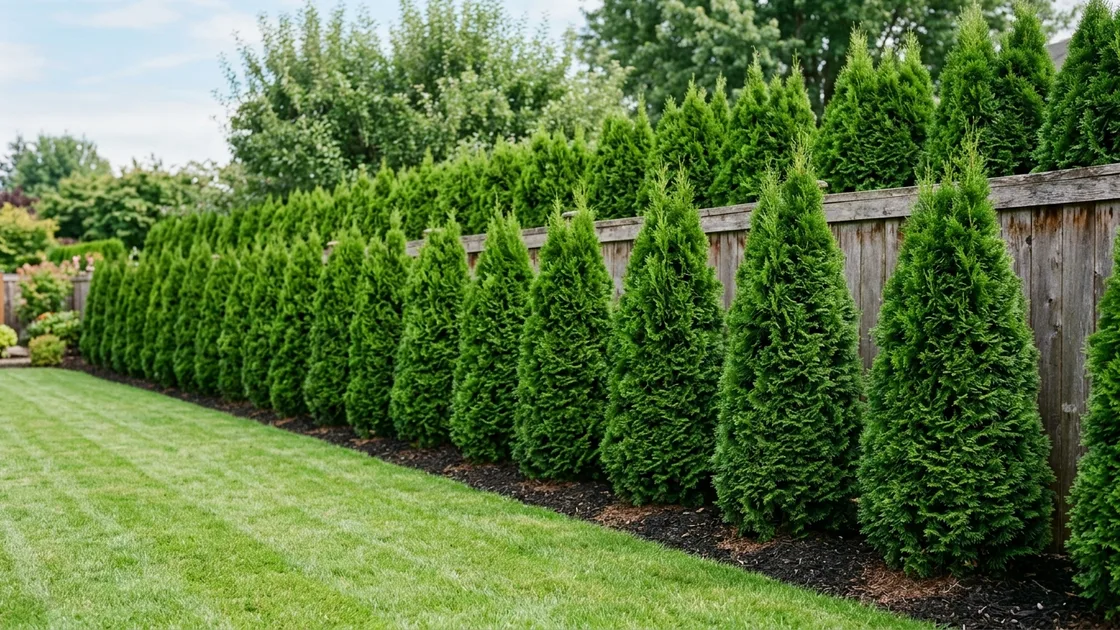
A living hedge is one of the best investments you can make in your yard. Along with giving you year-round backyard privacy, an evergreen or leafy hedgerow blocks dusty street air, softens traffic noise, slows winter wind, and gives songbirds a safe place to nest.
When you plant a hedge, though, there’s always a push-and-pull between two goals:
- Wanting Instant Privacy: Squeezing shrubs super close so they touch in Year 1.
- Keeping Plants Healthy Long-Term: Giving roots enough dirt and lower branches enough sun so the shrubs don’t starve, drop their bottom leaves, or catch root rot five years later.
In this simple guide, we compare single straight rows vs. double zigzag hedges, share easy shrub-counting math, explain why a single wide trench beats separate round holes, list trusted spacing distances for seven favorite hedge plants, and show the trimming trick that keeps hedges green right down to the grass.
1. Single Straight Row vs. Double Zigzag Hedge
First, check how wide a planting strip you can spare along your yard edge:
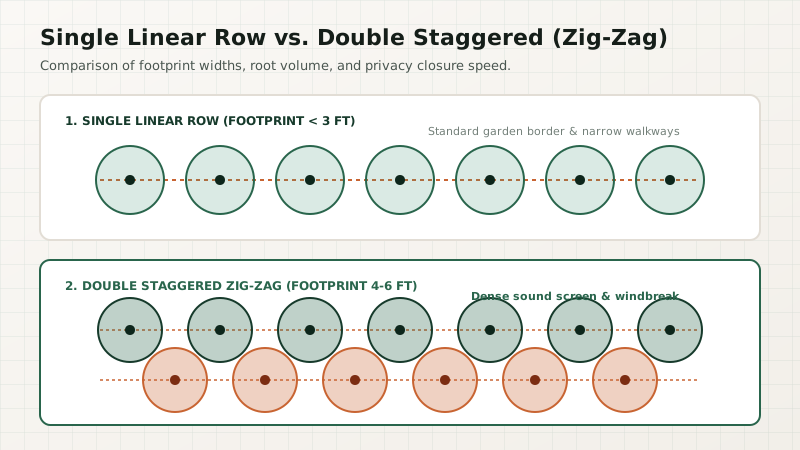
Option 1: Single Straight Row
- Space Needed: 2 to 3 feet wide.
- Best For: Tight suburban fence lines, neat front-yard walkways, low boxwood borders, and narrow side yards.
- How to Plant It: Space all shrubs along one straight string line using one spacing distance.
- Why Pick It: Cuts shrub costs nearly in half, takes less digging, and waters cleanly with one straight drip hose.
- Catch: Takes 3 to 4 years to close every gap completely, and if one shrub dies later, you’ll see an open gap until a new one catches up.
Option 2: Double Zigzag Row
- Space Needed: 4 to 6 feet wide.
- Best For: Blocking busy roads, fast backyard privacy walls, rural windbreaks, and thicker green screens.
- How to Plant It: Run two parallel lines 15 to 18 inches apart, shifting every shrub in Row 2 halfway over (by half a plant spacing) so it stands right behind the open gap between two shrubs in Row 1.
- Why Pick It: Blocks the view completely in half the time. Even if one shrub struggles or gets damaged by winter snow, neighboring branches fill behind it seamlessly.
- Catch: Costs roughly double for plants and takes a wider strip out of your lawn.
2. How to Count Exact Shrubs for Any Hedge Length
To figure out how many shrubs fit along a fence, walkway, or property line without squeezing an extra bush onto the end, use this simple rule:
Total Shrubs = Round Down((Hedge Length − Both End Gaps) ÷ Spacing) + 1
Here is what each number stands for:
- Hedge Length: Total length of your hedge run (in feet or inches).
- Spacing: Center-to-center distance between shrubs.
- Both End Gaps: Empty buffer space you want to leave away from fences, corners, or driveways (add the start gap and end gap together).
- Round Down + 1: Always round down to a whole number, then add 1 for the starting shrub at the front end.
Quick Example: A 40-Foot Fence With 2-Foot Shrub Spacing
Say your backyard fence runs 40 feet and you want to plant arborvitae 2 feet (24”) apart:
Setup A: Starting Right at the Ends (Zero Gap)
Shrubs = Round Down((40 − 0) ÷ 2) + 1 = 20 + 1 = 21 shrubs (Shrub #1 sits right at 0 ft and shrub #21 lands right at 40 ft.)
Setup B: Leaving a 1-Foot Buffer at Both Ends (1 ft on each side)
To keep mature branches from poking over a sidewalk or driveway, subtract 1 foot from each end (40 − 2 = 38 ft usable): Shrubs = Round Down(38 ÷ 2) + 1 = 19 + 1 = 20 shrubs
Setup C: Double Zigzag Row (2-ft Spacing)
- Row 1: Uses 21 shrubs (or 20 with end buffers).
- Row 2: Shifts inward by half a spacing (1 ft at each end), leaving 38 ft usable: Row 2 Shrubs = Round Down(38 ÷ 2) + 1 = 19 + 1 = 20 shrubs
- Total Order: 21 + 20 = 41 shrubs.
3. Popular Hedge Plants & Recommended Spacing
Different shrubs grow at wildly different speeds and widths. Here are reliable spacing targets for seven homeowner favorites:
| Common Hedge Name | Type & Look | Spacing | Yearly Growth | Untrimmed Full Height | Best Yard Use |
|---|---|---|---|---|---|
| Emerald Green Arborvitae | Narrow Evergreen Tree | 24” to 36” | 8”–12” (Medium) | 12–15 ft | Slim suburban privacy walls; keeps bright green color all winter. |
| Green Giant Arborvitae | Fast Giant Evergreen | 5 to 6 ft | 36”–48” (Very Fast) | 30–50 ft | Large yards, blocking highways, fast tall windbreaks. |
| English Boxwood | Neat Small-Leaf Shrub | 12” to 18” | 3”–6” (Slow) | 3–6 ft | Neat front borders, garden edging, classic formal walkways. |
| Cherry / English Laurel | Glossy Broadleaf Evergreen | 36” to 48” | 24”–36” (Fast) | 15–20 ft | Lush evergreen screen; handles part shade and dry spells well. |
| California Privet | Dense Leafy Hedge | 12” to 18” | 24”–36” (Fast) | 10–15 ft | Budget-friendly thick hedge; bounces back from heavy trimming. |
| English Yew | Deep Green Shade Hedge | 18” to 24” | 6”–12” (Slow) | 10–20 ft | Rich dark evergreen walls; thrives even in deep yard shade. |
| European Beech | Copper-Leaf Privacy Hedge | 18” to 24” | 12”–18” (Moderate) | 12–25 ft | Crisp leaves turn warm copper-gold and stay on branches all winter. |
4. Dig One Wide Trench Instead of Separate Holes
When homeowners plant twenty hedge shrubs, most rent a post-hole digger or dig twenty separate round holes. In heavy clay or packed yard dirt, separate round holes often backfire badly:
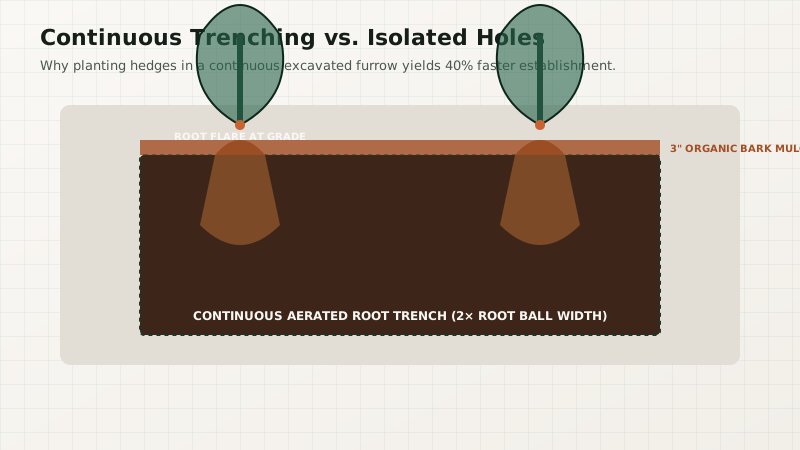
Why Single Round Holes Trap Roots (“Flowerpot Effect”)
If you dig a neat round hole in clay dirt and fill it with soft bagged soil, the hard clay ring around it acts just like a sunken clay bowl. Rainwater pools in the bottom and drowns roots—or in dry summer weather, roots circle around and around inside the soft pocket and choke the trunk.
Why Pros Dig One Long Trench
Professional landscapers dig one connected trench along the whole hedge line:
- Trench Width: Twice as wide as your nursery pot (usually 24 to 36 inches).
- Trench Depth: Just as deep as the root ball—never bury the trunk deeper, or bark rots at soil level.
- Loosen the Bottom: Break up the dirt at the bottom with a garden fork so roots anchor downward easily.
Sharing one loosened trench lets neighbor roots grow sideways together, helping new hedges settle in up to 40% faster while sharing moisture evenly down the line.
5. Tight vs. Roomy Spacing Over 5 Years
Here is what happens over the first five years when you plant arborvitae close together versus giving them a bit more breathing room:
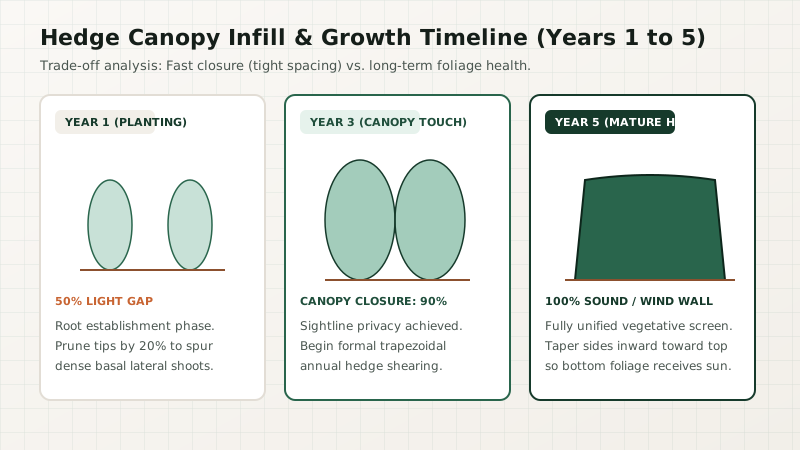
Closer Spacing (e.g., Emerald Green Arborvitae at 24”)
- Year 1: Branches overlap slightly; half-filled screen.
- Year 3: Solid green privacy wall with no gaps.
- Year 5+ Watch-Out: Roots fight harder for water. Unless you trim lightly to let sun inside, shaded inner needles may brown out and invite fungus.
Roomier Spacing (e.g., Emerald Green Arborvitae at 36”–42”)
- Year 1: Noticeable light gaps between bushes.
- Year 3: Outer tips meet; about 80% privacy achieved.
- Year 5+ Health: Healthiest long-term hedge. Each shrub keeps full, healthy green branches right down to the grass for 25+ years with far fewer pest or disease headaches.
6. Trim Slightly Narrower on Top (So Bottom Leaves Stay Green)
The #1 trimming mistake homeowners make is trimming hedge sides straight up and down—or worse, letting the top flare out wider than the bottom:
WRONG (Wider Top):               RIGHT (Wider Base / A-Shape):
      ________                               ___
     /        \                             /   \
    /          \                           /     \
   /            \                         /       \
  |              |                       /         \
  |____SHADED____|                      /___________ \
 Bottom loses leaves!               Full sun hits bottom!
The Wide-Bottom Trimming Rule
Sun shines down from overhead. Whenever the top of a hedge hangs out farther than the bottom, it casts permanent shade on lower branches. Over a few seasons, shaded bottom leaves starve, turn brown, and drop off—leaving bare woody legs that evergreens usually cannot regrow.
Keep your hedge shaped gently like an “A”:
- Trim the bottom 6 to 12 inches wider than the top.
- That gentle slope lets morning and afternoon sunlight bathe the lowest leaves all the way to the dirt.
- Round the top corners slightly if you get heavy wet winter snow so heavy drifts slide off without snapping branches.
7. Picking Nursery Sizes & Buying Spares
Shrubs come in three common store sizes—pick what balances your budget and patience:
| How They’re Sold | Root Size | Starting Height | Best For |
|---|---|---|---|
| Bare-Root Saplings | 6”–10” bare roots | 1–2 ft | Cheapest way to plant 100+ ft fence runs; plant early spring before buds open; takes 4+ years to fill in. |
| 3-Gallon Pots | 10” plastic pot | 3–4 ft | Best overall value. Light enough to carry, roots bounce back quickly, grows fast. |
| Large 7–15 Gallon / Burlap | 14”–18” heavy root ball | 5–7 ft | Instant privacy on Day 1; very heavy (100+ lbs); pricey delivery; needs steady watering for 2 summers. |
Why Buy 5% to 10% Extra Spares?
Always buy 5% to 10% extra shrubs on top of your exact count.
Tuck those few spare bushes in a sunny corner bed or big nursery pots in the same yard sun. If one hedge plant struggles through winter or gets broken by snow, you already have a matching, same-size shrub ready to drop straight into the gap!
Frequently Asked Questions
How far back from my property line should I plant a hedge?
Plan ahead and leave room from your property line equal to at least half the shrub’s full-grown width (often 2 to 3 ft for slim arborvitae, and 4 to 5 ft for wide laurels). Planting right on the line sends future branches onto your neighbor’s yard—where they generally have the legal right to prune anything hanging across the fence.
When is the best month to plant a new hedge?
In most regions, early fall (September to October) is best. The dirt stays warm enough for new roots to grow before winter, while cool air and fall rains prevent leaves from drying out. Early spring before new buds open is a close second.
Should I put strong fertilizer in the trench when planting?
No! Skip harsh synthetic fertilizer granules inside a fresh trench—concentrated salts can burn delicate cut roots. Instead, blend about 20% compost into your backfilled dirt, soak thoroughly after planting, and spread 3 inches of wood-chip mulch on top (keeping mulch an inch clear of the trunks).
Helpful Interactive Calculators
- Hedge & Linear Spacing Calculator — Plan single or double zigzag rows with exact shrub counts, trench dirt estimates, and cost math.
- Arborvitae Spacing Calculator — Compare Emerald Green vs. Green Giant privacy spacing and growth speed.
- Boxwood Hedge Calculator — Plan neat low walkways and courtyard borders.
- Master Hedge & Groundcover Chart — Browse clear spacing rules for 20+ popular shrubs, hedges, and groundcovers.